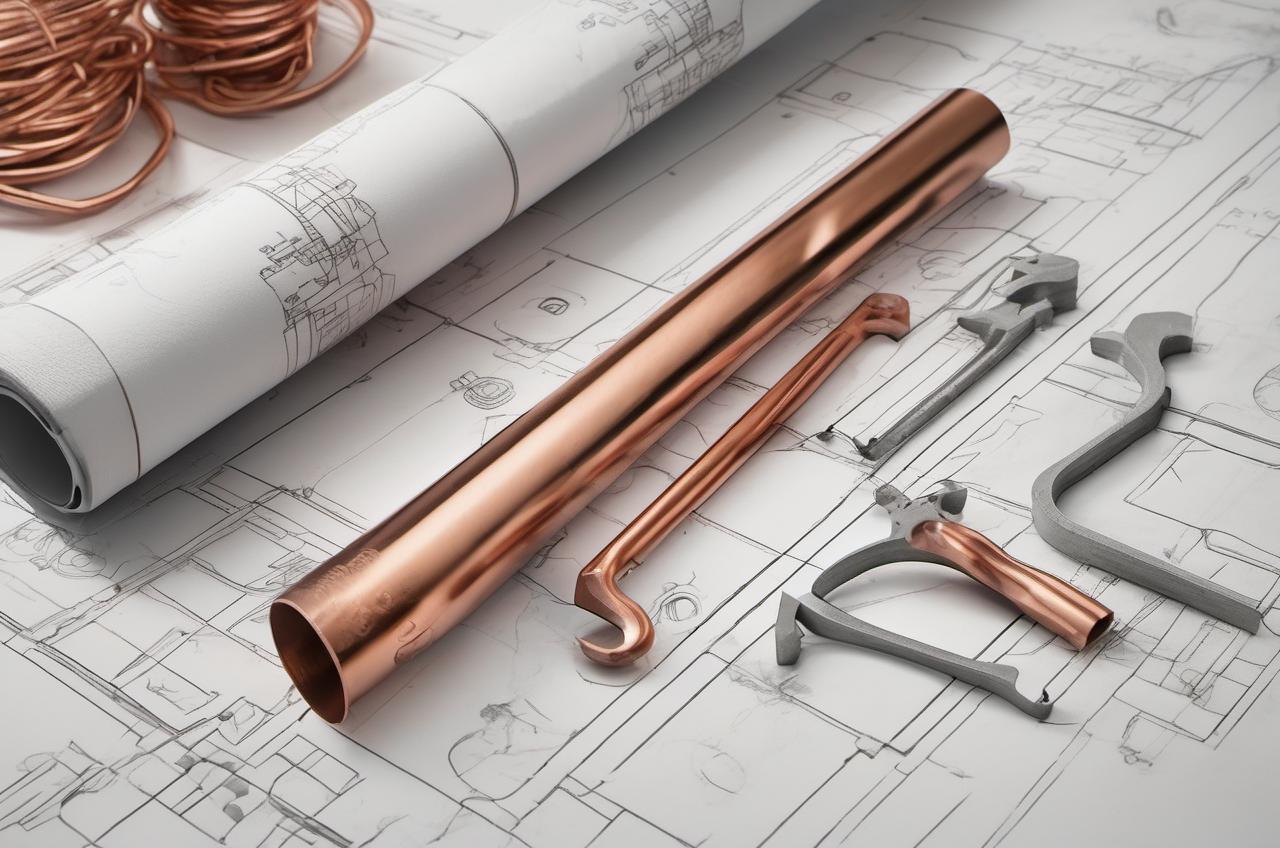
When it comes to DIY projects or plumbing tasks, cutting copper tubing is a handy skill to master. Whether you’re replacing old pipes or crafting something new, knowing how to cut copper tubing accurately can save you time and money. It’s straightforward, and with the proper tools and techniques, anyone can do it!
Cutting copper tubing involves using tools like a pipe cutter or hacksaw to create precise cuts in the tubing. This process requires careful measurement, proper technique, and safety precautions to ensure clean cuts and prevent harm. By following the right steps, you can enjoy a seamless experience, regardless of the project at hand.
In this piece, we’ll explore the essential aspects of cutting copper tubing. We’ll begin by discussing what copper tubing is and its various applications. Next, we’ll delve into the tools and materials you’ll need, ensuring you’re well-prepared. Additionally, we will highlight the importance of safety precautions to keep you protected throughout the process. After that, we will provide a detailed guide on the cutting process itself, including techniques using different tools. Finally, we will cover the finishing touches that ensure your project looks professional and functions optimally.
Understanding Copper Tubing
Copper tubing is a versatile and widely used material in plumbing and various industrial applications. It is known for its durability, resistance to corrosion, and excellent thermal conductivity. This makes it a preferred choice for water supply lines, heating systems, and even refrigeration.
There are three main types of copper tubing: Type K, Type L, and Type M. Type K is the thickest and most durable, making it suitable for underground and high-pressure applications. Type L, with a medium thickness, is commonly used in interior plumbing and heating systems. Lastly, Type M is the thinnest and least expensive, typically found in residential plumbing. Understanding these types will help you select the correct tubing for your specific needs.
Copper tubing is generally available in rigid and flexible forms. Rigid copper tubing is often used for fixed installations, while flexible tubing can be bent to fit the desired shape, which makes it useful for tight spaces. The versatility of copper tubing extends beyond plumbing, as it’s also used in air conditioning systems, gas lines, and even artwork. Knowing how to cut copper tubing allows you to adapt and customize it to any project you have in mind.
The ability to cut copper tubing isn’t just about putting two pieces together. It’s a skill that opens up new opportunities for DIY enthusiasts and professionals alike. With the right approach, anyone can master the art of cutting copper tubing and create functional, aesthetically pleasing installations.
Tools and Materials Needed
Before you embark on cutting copper tubing, it’s essential to gather the right tools and materials. Having everything at hand will streamline the process and ensure a successful outcome. Here’s a list of essential tools you’ll need:
- Pipe cutter: This is the most efficient way to cut copper tubing. A good-quality pipe cutter can make clean, straight cuts without excessive effort.
- Hacksaw: While not as preferred as a pipe cutter, a hacksaw serves as a versatile alternative if you don’t have a pipe cutter available.
- Deburring tool: After cutting the tubing, sharp edges may remain. A deburring tool smoothens these edges, preventing injuries and ensuring better connections.
- Marker: A permanent marker is useful for marking cut lines on the copper tubing to ensure accurate cuts.
- Measuring tape: Precise measurement is crucial for cutting tubing. A measuring tape will help guarantee that you cut at the right lengths.
It’s also important to have safety gear. Wearing safety goggles will protect your eyes from copper filings and any debris that may fly during the cutting process. Gloves are also advisable to guard against sharp edges once you’ve made the cut. A well-organized workspace will allow you to tackle your project efficiently. Make sure you have a flat, stable surface with good lighting so that you can see what you’re doing clearly.
Additionally, if you’re working on a specific plumbing project, ensure you have any other materials needed to complete the installation. This may include soldering supplies, fittings, or connectors, depending on what you’re planning to do. Preparing all supplies in advance will minimize interruptions and help you stay focused on the task.
By ensuring you have the right tools and safety equipment ready, you can tackle cutting copper tubing with confidence. It’s about making the process as smooth and efficient as possible, which will yield better results overall.
Measuring and Marking the Cut
Measuring and marking the cut are vital steps in the copper tubing cutting process. Accurate measurements can dramatically affect the success of your project. A precise cut saves time and prevents frustration down the line, especially if you have to redo your work due to miscalculations.
To start, determine the length you need. Use the measuring tape to find the correct measurement on the copper tubing. It’s important to measure twice to ensure accuracy. After confirming your measurement, it’s time to mark the cut line. A permanent marker works well for this task. Draw a clear, straight line across the tubing where you plan to cut.
When measuring, always consider any fittings or connectors you’ll be using later. Ensure that your measurements account for them. If you need to fit a connector at the ends, leave a little extra length for adjustments. It’s easier to trim a little extra than it is to add more material if you cut too short.
After marking your cut, double-check your measurements once more. This final verification ensures that everything aligns perfectly. Sometimes, when you’re ready to cut, you may realize that a slight adjustment is needed. Always take your time with this step; remember, a little haste now can lead to significant setbacks later.
In addition to being precise, your workspace should also be organized to help you stay focused. Lay the copper tubing flat and position it comfortably so you can mark accurately. If you’re working on a lengthy tube, consider using clamps to hold it in place while you measure and mark.
Proper measuring and marking might seem like tedious tasks, but they are crucial for achieving the best results. A small error can lead to complications and may require additional materials or time to fix.
Safety Precautions
Safety should always be a priority when working with tools and materials. Cutting copper tubing involves sharp edges and potential hazards, so taking necessary precautions is essential to avoid injuries. Here are some key safety measures you should implement:
Start by wearing protective eyewear. Copper filings can fly during the cutting process, and safety goggles will shield your eyes from potential debris. Additionally, wear cut-resistant gloves to protect your hands from sharp edges that may become exposed after cutting. Proper attire is important as well. Avoid loose clothing or jewelry that could get caught in tools.
Make sure your workspace is optimally set up. Use a steady, flat surface, such as a workbench, to avoid accidents. If you’re cutting a long piece of tubing, consider using clamps to secure it in place. This will prevent it from rolling or shifting unexpectedly while you’re working. A stable environment is key to maintaining control over your tools.
When using a pipe cutter or hacksaw, ensure that you’re familiar with the tools. Read user manuals if necessary. Incorrect handling can lead to accidents, so practice proper techniques while using them. Always position your hands and fingers away from the cutting path. It’s best to keep your focus on the task instead of being distracted by anything else in your environment.
Before you begin cutting, take a moment to check that your tools are in good condition. Dull blades and rusty tools can lead to mistakes. If your pipe cutter isn’t functioning smoothly or your hacksaw blade is worn out, replace them before you start.
Finally, take your time. It might be tempting to rush through the process, especially if you’re eager to complete the task. However, cutting wood carefully and methodically will lead to better outcomes and prevent accidents. Focus on making clean, controlled cuts while keeping safety in mind throughout the job. Following these precautions will help you maintain a safe working environment as you cut copper tubing effectively.
Cutting with a Pipe Cutter
Using a pipe cutter is one of the best methods for cutting copper tubing. This tool is designed specifically for this purpose. It is easy to use and offers a clean, precise cut. Equipped with a sharp blade and a sturdy frame, a pipe cutter allows you to create cuts without much effort. The design helps minimize the risk of deforming the pipe, ensuring excellent results every time.
To start, place the copper tubing in the cutter’s jaws. Adjust the cutter to fit snugly around the tubing. Make sure that the blade is aligned with the mark you made for the cut. Once you have adjusted the tool, lock it in place. Apply pressure by turning the cutter’s handle clockwise. This will tighten the cutter around the tubing and activate the blade. As you rotate the cutter, you will hear a gentle scratching sound. This is the blade making contact with the copper.
After a few rotations, you may need to loosen the cutter slightly. Turn it counterclockwise just enough to reposition it. This adjustment allows the cutter to bite deeper into the material. Retighten the handle, and keep rotating the cutter until the tubing is severed. The goal is to maintain consistent pressure while turning the cutter. This will produce an even cut without burrs or jagged edges.
Once the copper is cut, remove any remaining copper shavings or debris. Inspect the cut end to ensure it’s smooth. If there are any sharp edges, use a deburring tool to eliminate them. This final step is crucial for creating a safe and clean joint. A clean cut also makes it easier to fit with connectors or other pipes.
Using a pipe cutter offers several advantages. It provides clean cuts with minimal effort, reducing any chances of damaging the tubing. Additionally, this tool is portable and easy to store. No need for power sources or elaborate setups. A pipe cutter is a dependable choice for both professionals and DIY enthusiasts alike.
Cutting with a Hacksaw
While a pipe cutter is often the go-to tool for cutting copper tubing, a hacksaw is a useful alternative. This handheld tool is versatile and can be used in many situations. It is especially helpful if you do not have a pipe cutter available. However, using a hacksaw requires a bit more effort and skill to achieve a clean cut.
To start, secure the copper tubing in place. You can use clamps or a vise to hold the tubing steady. This is important because stability is key to maintaining control while cutting. Make sure that the section of tubing you plan to cut is easily accessible and clearly marked with your measurements.
Once you have everything set, grab the hacksaw and position the blade against the tubing at the marked line. Apply gentle pressure while you start sawing back and forth. The movement should follow a smooth, straight path. Avoid forcing the blade or pushing too hard. Remember, let the saw do the work. This method reduces strain on your body and helps you maintain better control.
As you continue cutting, keep checking the angle of your cut. A consistent angle is crucial for a straight cut. If the saw begins to veer to one side, adjust your technique to correct it. Patience is essential; rushing can lead to uneven or jagged cuts.
Once you have completed your cut, carefully assess the edges. Copper tubing typically has sharp edges, so it’s important to treat them with caution. If needed, use a deburring tool to smooth the cut edge. This step ensures a better fit for joints and reduces the risk of injury.
Using a hacksaw can be a bit more challenging than using a pipe cutter, but it still gets the job done. It’s a highly effective tool that allows for flexibility in different situations. While it may require additional effort, many individuals appreciate the versatility of a hacksaw, especially in a home improvement environment.
Finishing Touches
Once you have successfully cut your copper tubing, it’s time to focus on the finishing touches. These steps are often overlooked, but they are crucial for the functionality and safety of your plumbing system. Don’t rush through this process; making sure your tubing ends are in good shape will pay off in the long run.
The first step for finishing your copper tubing is deburring. This means smoothing out the sharp edges left over after cutting. These edges can be hazardous and may cause cuts or injuries. To deburr effectively, use a deburr tool, specifically designed for this job. You can also use a pocket knife or file for more casual projects. Regardless of the tool used, gently rub the edge until it feels smooth. This step is crucial, especially if you’re going to fit the tubing with other connectors.
After deburring, make sure to clean any debris from the copper tubing. Copper shavings from the cutting process can get trapped inside the pipe. Any contaminants can affect water flow or lead to potential problems in plumbing systems. Use a cloth to wipe the inside and outside of the cut ends, checking for cleanliness.
Next, inspect the entire length of the copper tubing for any signs of damage such as dents or scratches. Damage could create weak points in the tubing. If you discover any imperfections, consider replacing that section of tubing. The integrity of your copper plumbing is essential for long-term performance. Trust your instincts; if something seems off, take action.
Finally, ensure that the cut ends are dry before you proceed with any fittings or connections. Moisture can interfere with the effectiveness of any solder or sealants. By ensuring the surface is dry and clean, you will promote better adhesion and fit. The final result should be solid joints that will serve your plumbing needs reliably.
Taking the time to complete these finishing touches will lead to a much smoother experience in your project. A neat, clean finish will make a lasting difference in the overall quality of your work and help prevent problems down the line. Providing meticulous attention to these details speaks to your craftsmanship and dedication to the task.
Tips for Maintaining Your Copper Tubing
Maintaining your copper tubing is essential for ensuring its longevity and effectiveness in various applications. Copper is durable and resistant to corrosion, but it still requires care to prevent issues over time. Regular maintenance can save you money and trouble down the line by avoiding costly repairs.
One key tip is to inspect your copper tubing regularly. Look for signs of wear and tear such as discoloration, leaks, or corrosion. Pay special attention to joints and connectors, as these are often weak points in the system. If you notice any issues, address them promptly. The sooner you make repairs, the less likely they are to develop into larger problems.
Cleaning the copper tubing is also vital. Over time, mineral deposits and grime can build up on the surface. Using a non-abrasive cleaner and a soft cloth can help restore the shine and remove any built-up debris. For tough stains, a mixture of vinegar and salt can be effective. Apply the solution, let it sit for a few minutes, then wipe it away. This gentle cleaning method will keep your tubing looking good without causing scratches.
Another important factor is protecting the copper tubing from extreme temperatures. Copper can expand and contract with temperature changes. In cold weather, it can become brittle, while high heat can lead to deformities. Insulate outdoor pipes, especially those exposed to the elements. You can use foam pipe insulation or heat tape in winter to prevent freezing and cracking.
Finally, remain aware of what you put into your plumbing system. Avoid pouring harsh chemicals or corrosive substances down the drain. These substances can lead to deterioration of the copper over time. By being mindful of your practices, you help prolong the life of your copper tubing and keep your plumbing system functioning smoothly.
Taking proactive steps to maintain your copper tubing can make a significant impact. Regular inspections, cleaning, protection from temperature extremes, and careful substance use will keep your system healthy. Remember that a little attention goes a long way in ensuring that your copper tubing remains effective and reliable.
Troubleshooting Common Issues
Even with the best maintenance practices, issues can still arise with copper tubing. Knowing how to troubleshoot common problems can save you time, effort, and money in the long run. Here, we will discuss some typical issues and how to address them effectively.
Leaks are one of the most common problems associated with copper tubing. They can occur at joints or along the tubing itself. If you discover a leak, the first step is to turn off the water supply. Examine the area to determine the source of the leak. If it is coming from a joint, it may be due to a failed connection. You can try tightening the fittings or applying a patch to the area. If the leak persists, consider replacing that section of tubing or the fitting altogether.
Another issue is corrosion, which can affect the integrity of the tubing. While copper is resistant to corrosion, it can still happen under certain circumstances. If you notice greenish or brownish discoloration on the surface, that’s a sign of corrosion. The best remedy is to replace affected sections of tubing immediately. Leaving corroded areas intact can lead to leaks and further deterioration.
Sometimes, you may encounter discoloration of water coming from your faucets. This can be alarming and is usually a sign of rust or sediment buildup. To clarify the situation, run the water for a few minutes to see if the discoloration persists. If it does, inspect your plumbing for any issues or consider flushing your system. If the problem continues, it may be time to call in a professional for help.
Lastly, kinks or bends in the tubing can cause water flow issues. If you notice a drop in water pressure, check for any bends or kinks. These can block or restrict the flow of water, causing pressure problems. If you find a kink, gently straighten it out. However, if the damage is severe, you may need to replace that section of tubing to restore proper flow.
By being aware of these common issues and understanding how to troubleshoot them, you can save yourself from larger problems down the road. Keep an eye on your copper tubing and develop a habit of regular checks. Quick intervention can keep your plumbing system running smoothly.
When to Call a Professional
While many simple tasks can be handled by a DIY enthusiast, some situations require the expertise of a professional. Knowing when to call in a pro can save you from unexpected complications and ensure that your plumbing system remains reliable. Here are some instances when it’s best to seek professional help.
If you encounter persistent leaks despite your troubleshooting efforts, it’s time to call in a professional. While you may be able to fix minor leaks, recurring or severe leaks often signal more significant underlying issues. A plumber will have the tools and expertise needed to properly identify and repair the problem. Ignoring leaks can lead to water damage and mold growth, which could require expensive repairs.
Another situation to consider is if you suspect significant corrosion in the copper tubing. This issue is more challenging to diagnose and may require specialized knowledge. A professional can properly evaluate the extent of corrosion and determine if a repair or replacement is necessary. Don’t risk the structural integrity of your plumbing system by attempting to handle drastic corrosion cases yourself.
If you’re planning a major pipe installation or reconfiguration, hiring a professional is often the best course of action. Heavy work involving multiple connections, expansions, or the need for specialized fittings can quickly become complicated. Professionals understand local plumbing codes, ensuring compliance and safety. They also have access to high-quality materials, which may not be readily available to consumers.
Lastly, if you’re experiencing drainage issues that seem beyond routine blockages, it’s advisable to contact a plumber. Problems like slow drains, gurgling sounds, or sewer backups can point to severe plumbing issues. Professionals use tools such as cameras and augers to examine the plumbing beyond what you may see on the surface. Early intervention can prevent severe damage and costly repairs.
Entrusting professionals with complex plumbing issues ensures that your copper tubing and overall plumbing system remain in good condition. The investment in a professional can save you time, minimize stress, and guarantee a job well done. When in doubt, it’s always better to err on the side of caution and call for help when dealing with significant plumbing challenges.
Conclusion
Learning how to cut and maintain copper tubing is a valuable skill for any DIY enthusiast or homeowner. By mastering the techniques to cut copper and understanding how to maintain and troubleshoot your plumbing system, you can ensure that your home remains functional and free of plumbing issues. Always prioritize safety and precision in your work, and don’t hesitate to seek professional help when needed. With the right knowledge and practices, you can effectively manage your copper tubing projects and enjoy the benefits for years to come.
FAQs
How do I know which type of copper tubing to use for my project?
Choosing the right type of copper tubing depends on your specific application. Type K is the thickest and is ideal for underground or high-pressure installations. Type L is suitable for general plumbing and heating, while Type M, being the thinnest and least expensive, is typically used for residential plumbing. Assess your project’s needs to select the appropriate type.
Can I cut copper tubing without a pipe cutter?
Yes, you can cut copper tubing using a hacksaw if you don’t have a pipe cutter. However, using a hacksaw requires more effort and skill to achieve a clean cut. Be sure to secure the tubing properly and take your time to maintain a straight cutting line. Consider using a deburring tool afterward to smooth any sharp edges.
What should I do if I notice a leak in my copper tubing?
If you discover a leak in your copper tubing, turn off the water supply immediately to prevent further damage. Inspect the leak to determine its source. If it’s at a joint, tighten the fitting or apply a patch. If the leak persists or if you notice extensive corrosion, it may be best to call a professional plumber for repairs.
How can I prevent corrosion in my copper tubing?
To prevent corrosion, ensure that your copper tubing is not exposed to harsh chemicals or extreme temperatures. Regularly inspect for leaks and repair them promptly. Additionally, keeping the tubing clean and following general maintenance practices can significantly reduce the risk of corrosion over time.
Is it necessary to deburr copper tubing after cutting?
Yes, deburring copper tubing after cutting is essential. Sharp edges can cause injuries during installation and can lead to problems when connecting fittings or joints. Using a deburring tool will smooth out the edges, ensuring a safer and more effective connection.
How often should I inspect my copper tubing?
It’s advisable to inspect your copper tubing at least once a year or whenever you notice potential issues like water discoloration or unusual pressure changes. Regular inspections can help identify problems early, ensuring your plumbing remains in good condition and preventing costly repairs.