Welding stainless steel can open up a world of possibilities for fabricators and DIY enthusiasts alike. This versatile metal is treasured for its durability and resistance to corrosion. However, welding stainless steel does require specific techniques and a bit of knowledge to achieve strong, aesthetically pleasing welds. Whether you’re crafting art pieces or constructing durable equipment, mastering MIG welding on stainless steel is a valuable skill that pays off in various applications.
MIG welding stainless steel involves the use of a continuous solid wire electrode fed through a welding gun, creating an electric arc between the wire and the workpiece. This process not only produces high-quality welds but also maintains the integrity of the stainless steel. To successfully MIG weld stainless steel, you’ll need the right equipment, a firm understanding of safety protocols, and specific techniques for preparing the steel and setting up your MIG welder.
In this piece, we will explore various aspects of MIG welding stainless steel, from what MIG welding is to the properties that make stainless steel unique. We will discuss the types of stainless steel you may encounter and help you decide which one to use for your project. Additionally, we’ll cover essential safety precautions to take and the tools you’ll need before getting started. Lastly, we’ll look into surface preparation, which is crucial for achieving a clean and strong weld.
What is MIG Welding?
MIG welding, or Metal Inert Gas welding, is a popular welding process favored for its efficiency and versatility. It works by melting a filler wire fed from a spool through a nozzle while an inert gas, typically argon or a mix of argon and carbon dioxide, protects the weld pool from contamination. This process allows for smooth and continuous welds, making it ideal for both novices and experienced welders.
One of the standout features of MIG welding is its ability to work on various metals, including stainless steel. The method is relatively straightforward and allows for quick welding, reducing production times significantly. With the right settings and technique, welders can achieve strong joints with minimal effort. Plus, because the process is semi-automatic, it’s easier to control than some other techniques.
MIG welding is particularly advantageous because it produces less smoke and spatter compared to stick welding, making for cleaner work environments and easier cleanup. However, it does require adequate shielding gas and proper setup to prevent contamination of the weld, especially with sensitive materials like stainless steel.
Why Choose Stainless Steel for MIG Welding?
Stainless steel is a family of iron-based alloys that contain at least 10.5% chromium. This unique composition is what gives stainless steel its remarkable resistance to corrosion and staining. The durability of stainless steel makes it an ideal material for various applications, from kitchen utensils to structural components in buildings and bridges.
The choice to use stainless steel for MIG welding primarily stems from its excellent mechanical properties. It is strong, resilient, and can withstand high temperatures and aggressive environments. This is why industries such as food processing, oil and gas, and pharmaceuticals rely heavily on stainless steel for their equipment.
Another reason to choose stainless steel is its aesthetic appeal. Welded stainless steel constructions often have a sleek, modern look that is favored in many architectural applications. Additionally, stainless steel can be easily cleaned and maintained, making it a preferred choice for hygienic environments. Whether you’re creating a functional piece or a design statement, stainless steel offers both style and practicality.
Types of Stainless Steel: Which One to Weld?
When it comes to welding stainless steel, not all types are created equal. There are two primary categories of stainless steel: austenitic and ferritic. Austenitic stainless steels, such as 304 and 316, are most commonly used for MIG welding due to their excellent ductility and weldability. They contain significant amounts of nickel and manganese, which enhance their resistance to oxidation and corrosion.
On the other hand, ferritic stainless steels, like 430 and 446, have lower nickel content and can be less suitable for welding. They are typically stronger but less ductile, making them more prone to cracking during the welding process. Choosing the right type of stainless steel depends on your application’s requirements. Keep in mind factors like corrosion resistance, strength, and compatibility with the welding process you’ll be using.
Moreover, duplex stainless steels combine traits from both austenitic and ferritic types, offering good weldability with improved mechanical properties. While they are less commonly welded, understanding the specific characteristics of each type will help you determine the ideal choice for your project.
When selecting stainless steel for welding, assessing your project goals is crucial. Take into consideration the intended environment, the load-bearing requirements, and any aesthetic aspirations. Each stainless steel type presents its own advantages, and selecting the right one can greatly influence the success of your MIG welding process.
Safety First: Essential Safety Gear
Safety is an absolute priority when it comes to welding. MIG welding involves intense heat and glowing molten metal, which can be dangerous. Proper protective equipment (PPE) is crucial in shielding yourself from burns, eyes injuries, and inhalation of harmful fumes. A welding helmet with a suitable shade is essential. It protects your eyes from the bright arc light and reflects harmful ultraviolet and infrared rays.
In addition to a helmet, wearing flame-resistant clothing is critical. Long-sleeved shirts and long pants made from natural fibers can help prevent burns. Loose-fitting garments allow for breathability but ensure they don’t get caught in moving parts. Leather gloves are also necessary to protect your hands and promote grip while handling tools and materials.
Don’t forget about your feet! Steel-toed boots will safeguard your feet from heavy items and molten splatter. Although not often considered, hearing protection is also important. Welding can be noisy, and continuous exposure can lead to hearing loss over time. Use earplugs or earmuffs to minimize noise exposure and ensure a safer working environment.
Finally, ensure proper ventilation in your workspace. Welding generates smoke and fumes, which can be harmful if inhaled. Setting up exhaust fans or working outdoors can help keep the air clean. A respirator may also be beneficial in enclosed spaces. By following these safety protocols and using the right gear, you’ll create a secure environment for your MIG welding projects.
Tools and Equipment Required for MIG Welding
Before diving into MIG welding, having the right tools and equipment is key to achieving successful results. First and foremost, you’ll need a MIG welder. These machines can vary in capability, so look for one that suits the thickness of the stainless steel you’ll be working with. Some welders include built-in spool guns specifically designed for feeding aluminum and stainless steel wire.
Next, you’ll require a supply of shielding gas, typically argon mixed with carbon dioxide. The gas protects the weld area from atmospheric contamination and ensures a clean weld. Be sure to have an appropriate gas cylinder and regulator that matches your welder’s requirements. It’s also wise to keep a spare gas cylinder available, so you’re not caught short in the middle of a project.
Then there’s the filler wire. For stainless steel, ER308L wire is a popular choice as it provides good corrosion resistance and weldability. Make sure to choose the right diameter based on your MIG welder’s specifications. In addition to filler wire, having contact tips and nozzles in various sizes can make your job easier. These components will wear out over time, so having extras on hand ensures you can switch them when needed.
Basic hand tools are equally important. A wire brush will help clean the surface of the stainless steel before welding, ensuring a solid bond. A grinder can also be beneficial for removing rust, scale, or coatings. Clamps and fixtures will hold your workpieces in place, providing stability while you weld. Finally, don’t overlook safety equipment such as gloves, helmets, and protective clothing to keep yourself safe during welding.
Preparing the Stainless Steel for Welding
Preparation is a crucial step in the MIG welding process. Properly preparing your stainless steel ensures better weld quality and minimizes the risk of defects. Start by cleaning the surface of the metal thoroughly. Remove any rust, oil, grease, or paint using a wire brush or grinder. Contaminants can adversely affect the weld, leading to defects such as porosity or lack of fusion.
After cleaning, inspect the metal for any signs of damage or defects. If you notice any cracks or deep scratches, take the necessary steps to repair or replace the workpiece. For thicker sections of stainless steel, you may want to preheat the metal to improve weld penetration and reduce the risk of warping. A temperature of around 300°F is often recommended.
Next, fit up your pieces to be welded. Proper alignment is essential to ensure a strong joint. You may want to clamp the pieces together to prevent any movement during welding. Tacking the pieces can also be beneficial; this involves welding small spots at strategic points to hold the metal in place temporarily before completing the weld.
Make sure to also consider the gap between the pieces you’re welding. A small consistent gap is often ideal. It allows the molten metal to flow properly and penetrate through both pieces. Too wide of a gap can lead to issues, while too narrow can cause overheating. Preparing the stainless steel surfaces correctly will facilitate better penetration and a stronger bond, ultimately leading to a successful weld.
Setting Up Your MIG Welder
Setting up your MIG welder is a critical step toward achieving quality welds on stainless steel. The first thing you should do is read the manufacturer’s manual for specifics related to your machine. Each welder operates slightly differently, and knowing your equipment will help you maximize its performance.
Begin by selecting the right settings for the thickness of the stainless steel you are working with. Adjust the voltage and wire feed speed according to the material. The general rule of thumb is that thicker materials require higher voltage and a faster wire feed. Conversely, thinner materials will need lower settings. Doing a test weld on scrap material before starting can provide valuable insight into the correct settings.
Next, review the gas flow rate. For stainless steel, a flow rate of about 15-20 cubic feet per hour (CFH) is usually sufficient. A higher flow rate can cause excess turbulence in the shielding gas, leading to poor weld quality. Make adjustments as necessary and ensure your gas connections are secure to prevent leaks.
Check your welding gun and ensure the correct nozzle and contact tip are in place. The tip diameter should match the size of the filler wire you’re using. Make sure the wire is feeding smoothly and without obstruction. Additionally, inspect the ground clamp connection to guarantee a good electrical circuit. Cleaning any paint or corrosion from the metal where the clamp attaches ensures a solid grounding. Taking these steps to properly set up your MIG welder will contribute to more consistent and high-quality welds.
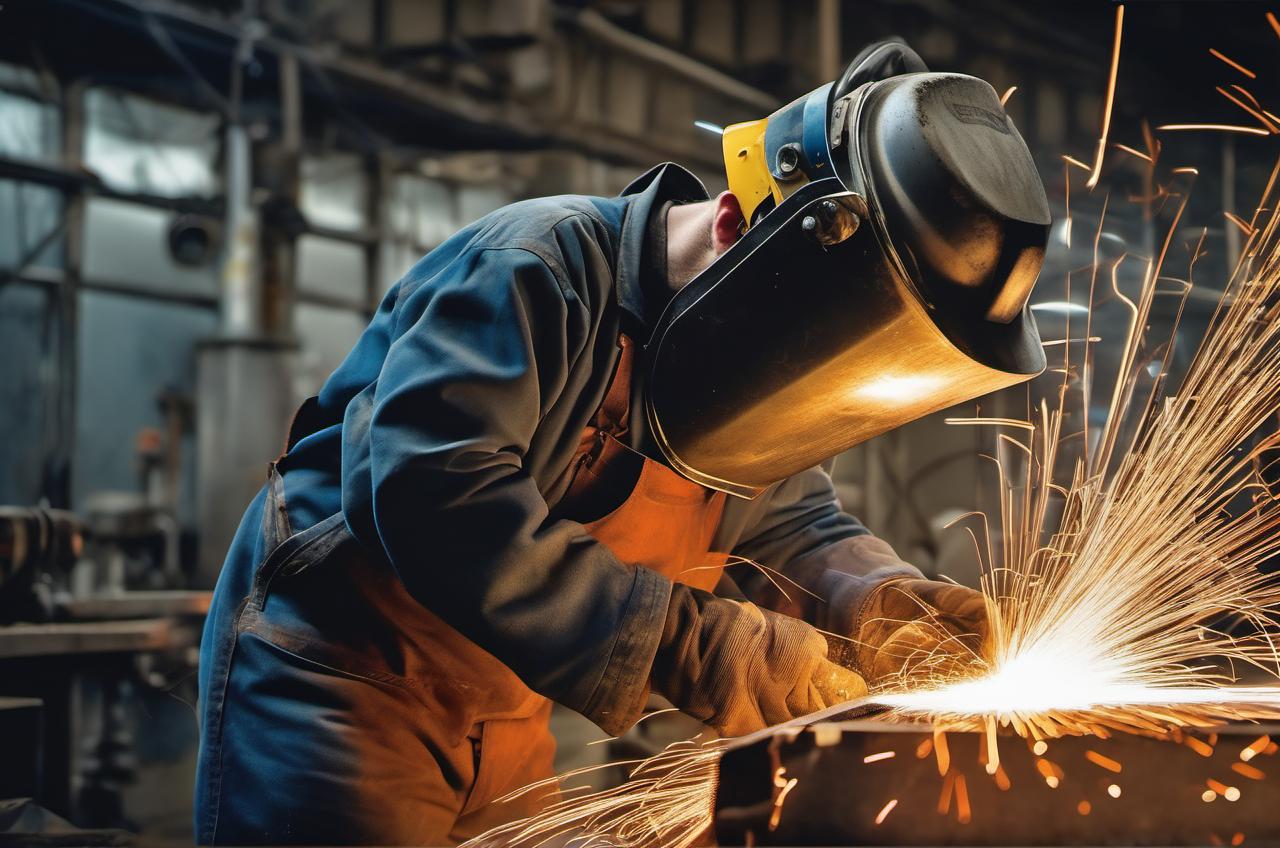
Step-by-Step Guide to MIG Welding Stainless Steel
Once you’re properly prepared, it’s time to dive into the MIG welding process itself. Start by donning your safety gear, ensuring your helmet is down and your gloves are on. Begin by positioning your workpiece on a stable surface and securing it with clamps to prevent movement. Ensure it’s clean and free from contaminants, as we discussed earlier.
Begin the welding process with tack welds at various points around the joint. This helps hold the pieces in alignment and reduces the risk of warping as you continue with the full weld. Ensure the arc distance is consistent—keeping the welding gun at the proper angle ensures an adequate weld pool. A 10 to 15-degree angle is generally preferred.
When you start the actual weld, maintain a steady hand. Move the welding gun in a continuous motion along the joint at a consistent speed. If you move too quickly, the weld may be weak and lack adequate penetration. If you move too slowly, you risk overheating and burning through the material. Always keep an eye on the weld pool, and adjust your speed accordingly.
Pay attention to the sound produced while welding, as it can offer valuable feedback. A consistent crackling or sizzling sound indicates a good arc. If you hear excessive popping or hissing, something might be off, potentially requiring adjustments to your settings. After completing a weld, let it cool before inspecting and cleaning it up, as proper cooling is essential for minimizing distortion and ensuring a strong weld. Good practices during this step will lead to successful and aesthetically pleasing welds.
Troubleshooting Common MIG Welding Issues
MIG welding is generally straightforward, but issues can arise. Knowing how to troubleshoot common problems can save you time and frustration. One common issue is porosity, which appears as small holes in the weld bead. This often happens when there is contamination on the surface being welded. Make sure to properly clean surfaces to eliminate oil, rust, and other residues before starting.
Another frequent problem is a lack of fusion, which occurs when the weld bead fails to merge properly with the base metal. This may result from either insufficient heat or poor technique. To combat this, double-check your welder’s settings. You may need to increase the voltage or slow down your travel speed. Proper gun angle and distance from the workpiece are also crucial.
Undercut is another nuisance. This occurs when the base metal melts away along the edges of the weld, leaving a groove. Under-cutting can weaken the joint significantly. It typically results from welding too fast or using excessive heat. Adjust your technique by decreasing travel speed and using a steady hand to promote even heating.
Welding spatter is another common issue that can create an unpleasing appearance on your welds. Spatter occurs when molten metal flies away from the weld pool. It can result from high voltage settings or improper gas flow. You can minimize spattering by fine-tuning your settings and ensuring proper gas coverage. Remember that a clean work area can also help with spatter control.
These common issues can be tackled by taking a step back and analyzing your welding technique and equipment settings. Keep a close watch on your welds and make adjustments promptly. This awareness and proactive approach will enhance your welding skills over time.
Finishing Touches and Post-Welding Care
After you’ve completed your weld, it’s essential to inspect your work. A close examination helps ensure that you’ve achieved the desired quality and strength. Look for any defects such as porosity, cracks, or uneven bead size. If you notice any issues, you may need to grind out the faulty weld and redo it.
Cleaning the weld area is also an important step. Removing slag, spatter, and any oxidation will enhance the appearance and longevity of the weld. Use a wire brush or grinder to clean the area thoroughly. For stainless steel, a chemical passivation solution can improve corrosion resistance and restore the surface finish.
If you want your weld to look professional, consider finishing the surface. You may want to use a flap disc on a grinder to achieve a smooth finish. This can give your project a polished, aesthetically-pleasing look. Pay attention to your technique, as the goal is to blend the welded areas with the surrounding metal seamlessly.
It’s also advisable to apply a rust-inhibiting coating, especially if the piece will be exposed to the elements. This prevents tarnishing and corrosion over time. You can choose from several options, including paints, sealants, or even oils designed for stainless steel.
Finally, proper storage is crucial. Store your pieces in a clean, dry environment free from harsh chemicals that may cause degradation. Regular maintenance checks on your welded items will help preserve their integrity and appearance for years to come. This attention to post-weld care will undoubtedly extend the life of your projects.
Practical Tips for Successful MIG Welding
To ensure the best results in MIG welding stainless steel, incorporating practical tips can make a significant difference. First, always use clean and dry materials. Keeping the stainless steel free of moisture or oil will help you achieve a high-quality weld. Perform regular inspections of both your base materials and your equipment.
Practice makes perfect, so carve out time for practice. Set up some scrap pieces of stainless steel to test different techniques and settings. The more you practice, the more comfortable you’ll become with the nuances of welding. Use this time to try various joint designs and positions, which can further refine your skills.
Using the correct technique is vital. As a beginner, concentrate on maintaining a consistent travel speed and distance from your workpiece. Controlled movements will lead to smoother and stronger welds. Furthermore, using a push technique, where you hold the gun at a slight angle and push the nozzle toward the weld, works well with stainless steel. This approach promotes better penetration and heat distribution.
It’s also important to be aware of your surroundings. A clean and organized workspace minimizes accidents and distractions. Ensure your work area is well lit, helping you maintain focus during the welding process. Also, remember to have all necessary tools nearby. This organization can reduce the chance of oversight.
Lastly, keep your equipment in good condition. Regularly check for wear on hoses, tips, and liners. Replacing worn components keeps the welder functioning efficiently. This attention to detail will ultimately lead to higher-quality welds and a more enjoyable experience.
Final Thoughts on MIG Welding Stainless Steel
MIG welding stainless steel requires a combination of skill, practice, and knowledge. By understanding the process and following best practices, you can achieve strong, durable, and appealing welds. Pay careful attention to preparation and post-welding care to ensure long-lasting results.
Being aware of potential issues and knowing how to tackle them is essential. Troubleshooting common problems will save you time and frustration, allowing you to focus on perfecting your technique. Furthermore, always make safety a top priority. Wearing the right protective equipment and maintaining a tidy workspace is vital for a successful and secure welding experience.
Ultimately, persistence is key. As you hone your skills, continue to learn and adapt. Every project presents opportunities for growth and improvement. Whether you are a novice or an experienced welder, embracing this journey can ultimately lead to exceptional results. Happy welding!
FAQs
What is the difference between MIG welding and TIG welding?
MIG welding (Metal Inert Gas welding) uses a continuous wire electrode and shielding gas to create a weld. It’s generally faster and easier to learn, making it ideal for beginners. TIG welding (Tungsten Inert Gas welding) uses a non-consumable tungsten electrode and requires a filler rod to be manually fed into the weld pool. TIG welding provides greater precision and is better suited for thin materials or detail-oriented projects but is more challenging to master.
Can I MIG weld stainless steel without shielding gas?
While it is technically possible to weld stainless steel without shielding gas using a flux-cored wire, it is not recommended for quality welding. Shielding gas protects the weld pool from atmospheric contamination, which can lead to defects like porosity. For the best results, always use the appropriate shielding gas, such as a blend of argon and carbon dioxide, to ensure clean and strong welds.
What type of stainless steel is best for MIG welding?
Austenitic stainless steels, such as 304 and 316, are the most commonly used for MIG welding. They offer excellent ductility, corrosion resistance, and weldability. Ferritic stainless steels can be more challenging to weld due to their lower ductility and higher tendency to crack. In general, if strength and corrosion resistance are priorities, austenitic stainless steels are the preferred choice for most MIG welding applications.
How do I know if my MIG welder is set up correctly?
To determine if your MIG welder is set up correctly, start by performing a test weld on a scrap piece of material. Check for consistent bead appearance, good penetration, and minimal spatter. If the weld shows issues like undercutting, porosity, or lack of fusion, you may need to adjust the voltage, wire feed speed, or travel speed. Observing the sound of the arc can also provide information; a consistent sizzling sound usually indicates good settings.
How do I prevent warping when welding stainless steel?
To prevent warping, maintain even heat distribution during the welding process. Use tack welds to hold pieces firmly in place, reducing movement. Weld in a sequence that minimizes heat concentration on one spot, such as alternating sides. Additionally, consider preheating thicker materials slightly before welding to help with heat distribution. These precautions can significantly reduce the risk of warping in your stainless steel projects.
Can I use my MIG welder for aluminum as well as stainless steel?
Yes, with the right adjustments and equipment, you can use your MIG welder for both stainless steel and aluminum. However, you will need to switch to a different filler wire, such as ER4047 or ER5356 for aluminum, and utilize a spool gun for better wire feeding. Adjust the welder settings, including voltage and gas flow rates, according to the type of metal you are working with, as each has its specific requirements for effective welding.