Buffing aluminum is a rewarding endeavor that can breathe new life into dull, oxidized surfaces. Whether you want to restore a vintage car’s shine or rejuvenate your kitchen appliances, knowing how to properly buff aluminum can make a significant difference. Not only does it improve aesthetics, but it also adds protection against future damage. So, roll up your sleeves—your aluminum surfaces are about to look fabulous!
To buff aluminum, you need to clean the surface, choose the right technique, and use the appropriate tools and compounds. Start by preparing your workspace and gathering supplies like a buffing wheel, a drill, and a specialized buffing compound. After cleaning the aluminum to remove any grime or oxidation, you’ll apply the compound with the buffing wheel to achieve that brilliant shine. Finally, proper maintenance ensures that your aluminum stays looking great for years to come.
In this guide, we’ll discuss everything you need to know about aluminum buffing. We’ll begin by understanding what aluminum buffing is and why it’s vital for maintaining those shiny surfaces. Next, we’ll list the tools and supplies you’ll need to get started. After that, we’ll delve into the preparation process, which includes cleaning the aluminum and setting up your workspace for success. Let’s get started!
What is Aluminum Buffing?
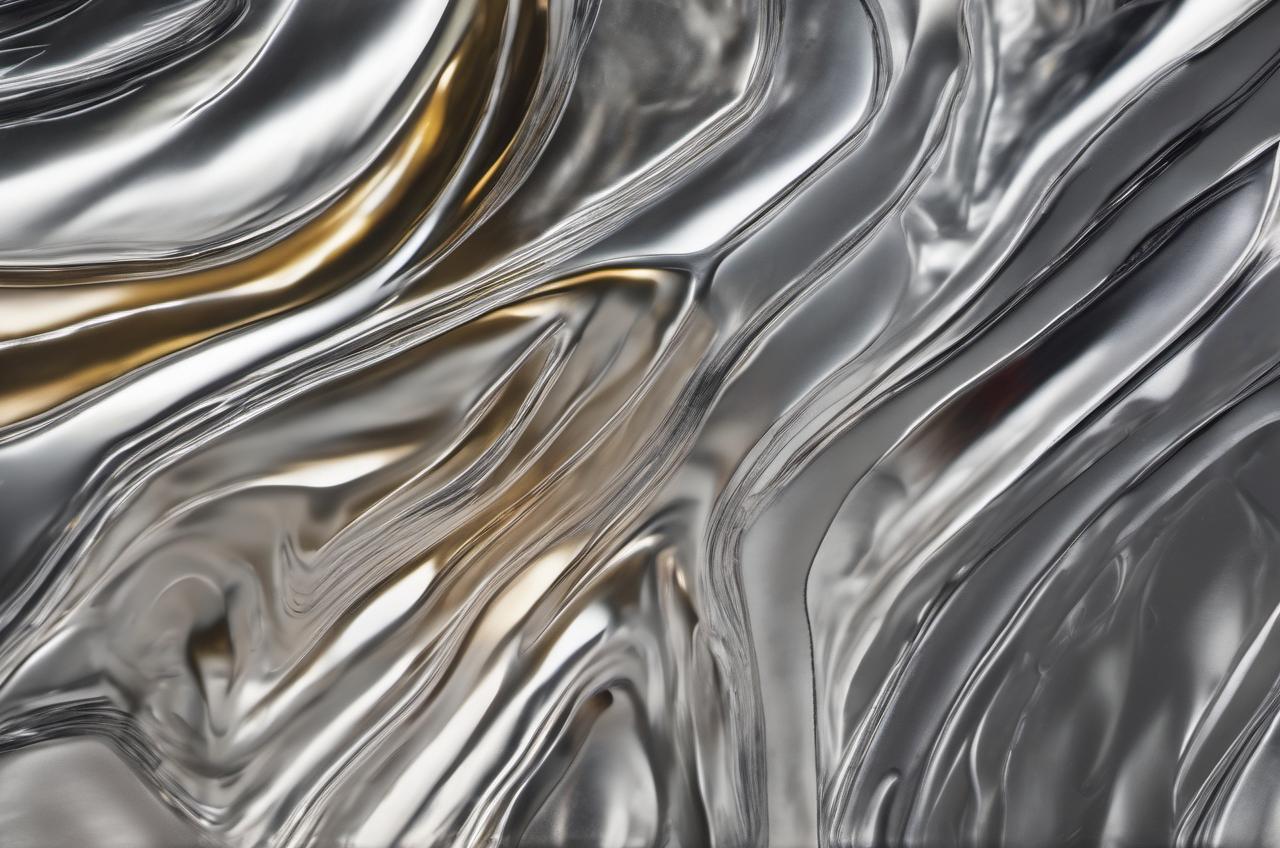
Aluminum buffing is a finishing process used to improve the appearance of aluminum surfaces. This technique smooths out imperfections and enhances the luster of the metal. Buffing can be done using manual methods, but it’s often more efficient when using machines. Over time, aluminum can develop scratches, oxidation, and tarnish, leading to a dull appearance. Buffing helps to restore the surface by removing these blemishes and creating a reflective sheen.
Many industries utilize aluminum due to its lightweight, durable, and corrosion-resistant properties. However, maintaining its appearance is crucial. That’s where buffing comes into play. This method not only improves look but can also potentially increase the lifespan of your aluminum assets. An appealing, polished finish can make a significant difference, whether it’s for a vehicle, kitchenware, or other decorative items.
Overall, aluminum buffing is a technique that can rejuvenate and protect aluminum surfaces, making them more attractive and long-lasting. A well-buffed piece of aluminum is not just about aesthetics; it’s about elevating the quality and value of the product itself.
Why Buff Aluminum?
Buffing aluminum offers myriad benefits. First and foremost is aesthetic appeal. A polished aluminum surface gleams and can significantly enhance the overall look of any item, be it a car wheel or kitchen appliance. Buffing provides that showroom-quality finish, elevating your aluminum to a fresh, new state. It’s particularly appreciated by those passionate about restoring classic cars or maintaining outdoor furniture that must endure the elements.
Another important reason to buff aluminum is protection. Over time, oxidation can lead to pitting and corrosion, which can compromise the integrity of aluminum. By buffing the surface, you remove oxidized layers and can apply protective coatings more effectively. This process helps create a barrier against environmental elements like moisture and dirt, ultimately prolonging the life of the aluminum.
Additionally, buffing is crucial for maintenance. For industries that rely on aluminum for equipment and tools, regular buffing is a key element of a preventive maintenance strategy. This can reduce the frequency of necessary repairs. Even for homeowners, learning to buff aluminum regularly can significantly reduce the wear and tear on everyday items.
Finally, buffing can also lead to increased resale value. If you’re considering selling a vehicle or any other aluminum items, a meticulous polish can entice buyers. They are more likely to be drawn to visually appealing products, particularly those in excellent condition. In other words, the effort you put into buffing pays off!
Tools and Supplies Needed for Buffing Aluminum
Before diving into the buffing process, it’s crucial to have the right tools and supplies on hand. This preparation will make your experience smoother and more effective. Here’s a comprehensive list to consider:
- Buffing Wheel: This is perhaps the most essential tool for buffing aluminum. A bench grinder or a variable-speed polisher with a buffing wheel attachment works wonders.
- Drill: A drill can be used to attach smaller buffing pads if you’re working on intricate areas.
- Buffing Compounds: Various compounds cater to different levels of oxidation and types of aluminum. Consider products like white rouge, blue rouge, or other specialized compounds for best results.
- Cleaning Supplies: These include non-abrasive pads and cleaning solvents effective against oxidation and dirt.
- Safety Gear: Protect your eyes and face with goggles or a face shield, and wear gloves to protect your hands.
Once you’ve gathered your supplies, it’s essential to understand how each item works in relation to the others. A buffing wheel operates best when paired with a suitable compound that suits the condition of the aluminum surface. Different compounds exist for different finishes, ranging from coarse to fine polishing.
Setting up your workspace is also fundamental. Ensure your tools are within easy reach, and that you have adequate space for maneuvering to prevent accidents. Make sure the area is well-ventilated, especially when using chemicals for cleaning or buffing. Having a clean, organized setup enhances focus and effectiveness.
By preparing adequately, you’ll achieve better results and enjoy the buffing process even more. Always remember that the right tools can greatly influence the quality of your results in the buffing process.
Cleaning the Aluminum Surface
Before you can buff aluminum effectively, you must pay careful attention to preparing the surface. Cleaning is the very first step. It’s vital to remove any dirt, grease, or oxidation that has built up over time. A clean surface will enhance the buffing process and help achieve a superior shine.
Start by using a non-abrasive cleaner specifically designed for aluminum. Avoid harsh chemicals, as they can cause damage or discoloration. Warm water mixed with mild soap often works wonders. Use a soft cloth or a non-abrasive pad to scrub the surface gently. Pay extra attention to corners and crevices where dirt can accumulate. Rinse thoroughly afterward to remove any leftover soap residue.
For tougher oxidation, you might need a more aggressive cleaning solution. Options include vinegar or specific aluminum cleaners that remove oxidation without scratching. Apply your chosen solution liberally, letting it soak for a short while. This will help break down those stubborn spots. After soaking, scrub the area with a soft cloth or a dedicated aluminum brush for better effectiveness.
Using a microfiber cloth is also beneficial. It captures particles without scratching, leaving you with a smooth surface. Dry the aluminum completely after cleaning. Any moisture left can interfere with the buffing process and result in a less shiny finish.
Once cleaned, examine the aluminum closely for any remaining imperfections. Often, you’ll catch spots that require additional attention. Taking this time for thorough cleaning pays off. The fewer contaminants on the surface, the better your buffing results will be.
Choosing the Right Buffing Technique
With the surface clean and prepared, the next step is to choose the buffing technique that will work best for your project. Different techniques yield varied results based on the type and condition of the aluminum you’re working with. Understanding your options sets the stage for an outstanding finish.
Hand buffing is a great technique for smaller areas or delicate items. This method allows for greater control and precision, reducing the risk of oversaturation with compounds. To hand-buff, use a soft cloth or a small buffing pad. Apply your buffing compound sparingly to the cloth, and work it into the surface using circular motions. This technique is particularly effective for intricate designs or tight spaces.
Conversely, machine buffing is more suitable for larger surfaces or for a quicker result. Using a buffing wheel attached to a drill or polisher can significantly speed up the process. It often gives a more consistent shine across larger areas. Adjust the speed according to your surface’s needs; lower speeds are well-suited for rough surfaces, while higher speeds can achieve a brilliant finish.
When buffing with machines, make sure to keep the wheel moving consistently. This reduces the risk of overheating and damaging the aluminum surface. A good rule of thumb is to apply light pressure. Always allow the wheel to do the work rather than forcing it down onto the surface.
Choose your technique based on your comfort level and the project’s requirements. Both hand and machine buffing can yield exceptional results, but each requires attention to detail. Understanding your options empowers you to create a beautifully finished aluminum item.
Setting Up Your Workspace
An organized and safe workspace is critical for successful aluminum buffing. A well-thought-out environment not only enhances efficiency but also ensures your safety during the process. Here are a few tips to help you prepare an ideal workspace.
Start by clearing a flat surface. A sturdy table or workstation is essential, ensuring that your tools and supplies are easily accessible. Adequate space allows you to maneuver while working on your project. It minimizes the chance of clutter or accidental spills that might disrupt the process.
Good lighting is equally important. Bright, even lighting will help you see the surface better. This visibility enables you to detect any imperfections before and after buffing. If working indoors, consider a lamp or overhead light. Natural daylight also works wonders if you have access to it.
Ventilation cannot be overlooked, especially if you’re using cleaners or compounds that emit fumes. Open windows and doors to promote airflow. If possible, use a fan to help circulate air in the area. Good ventilation not only makes the environment more pleasant but also helps clear any dust generated during the buffing.
Lastly, safety gear is non-negotiable. Always wear protective eyewear to shield your eyes from particles that may fly during buffing. A face shield is also a good investment if you’re using a machine. Gloves will protect your hands, ensuring a sturdy grip while preventing potential cuts or scrapes. Safety should always be your priority when working with tools and materials.
With a tidy, well-lit, and safe workspace established, you’ll find the buffing process goes smoothly. This preparation fosters focus and confidence as you tackle your aluminum surfaces.
Step-by-Step Guide to Buffing Aluminum
Now that you’ve cleaned the aluminum and set up your workspace, it’s time to dive into the buffing process itself. Following a step-by-step guide ensures you don’t miss any critical details that contribute to achieving that stunning shine.
Start by choosing the appropriate buffing compound based on the condition of the aluminum. For heavily oxidized surfaces, a coarse compound will work well to remove the bulk of the oxidation. As you progress, switch to a finer compound for a smooth finish.
Next, attach the buffing wheel to your polisher. If you’re using a hand-held tool, ensure it’s securely fastened. An unstable setup can lead to accidents, so double-check your equipment. For hand buffing, apply a small amount of the compound directly onto the buffing cloth or pad.
Begin buffing the aluminum surface. If you’re machine buffing, turn on the polisher and gently press it against the aluminum. Use slow and steady strokes, allowing the compound to work into the surface. For hand buffing, employ circular motions, ensuring even pressure throughout.
After a few passes, check your progress. Look for areas that might need more attention. Buffing is often a task of trial and error. It may take several passes with varying amounts of pressure to achieve your desired shine. Don’t rush this part of the process; patience yields a beautiful finish.
Once you have your intended shine, switch from the buffing compound to a protective coating or sealant, if desired. This step helps preserve the finish and protects against environmental damage. Clean any remaining compound from surface crevices prior to applying the sealant for the best outcome.
With these steps, you’ll dramatically improve the appearance of your aluminum surfaces. A methodical approach maximizes results and enhances your confidence in completing aluminum buffing projects.
Tips and Tricks for a Flawless Finish
Achieving that flawless finish while buffing aluminum involves a few extra tips and tricks that can elevate your results. Each small step can make a significant difference in the quality of your end product. Here are some helpful suggestions to keep in mind.
First, keep your buffing wheels clean and well-maintained. Dust and debris can accumulate on the wheels, which can lead to scratches on your aluminum surface. Regularly wipe down the buffing pad with a clean cloth to eliminate residues. You can even use a dedicated wire brush to keep the buffing wheel in optimal condition.
Consider practicing on a scrap piece of aluminum before moving to your prized project. This practice run helps you gauge the effectiveness of your technique and compounds while minimizing the risk of damaging your main piece. Plus, it gives you time to adjust your process to find what works best for you.
Another tip is to maintain consistency in your buffing speed and pressure. Going too quickly or applying uneven pressure can result in streaking or spotty finishes. Take your time and enjoy the process. A steady hand will work wonders in achieving that polished and uniform look.
Finally, don’t forget about post-buffing maintenance. After buffing, a protective coating or wax is essential for preserving that brilliant shine. Various products are available specifically for aluminum surfaces, creating a barrier that helps prevent oxidation and keeps your items looking fresh. Regularly check your aluminum surfaces for wear and reapply these coatings as necessary.
By implementing these tips and tricks, you can ensure that your aluminum buffing projects deliver excellent results. Getting into a routine with these practices will make buffing feel like second nature. As you gain experience, you’ll discover the joy of revealing the natural beauty of aluminum.
Step-by-Step Guide to Buffing Aluminum
Now that you’ve cleaned the aluminum surface and set up your workspace, it’s time to get into the heart of the buffing process. This step-by-step guide will walk you through each phase of buffing, ensuring you achieve that shiny, polished finish while preserving the integrity of the metal.
Begin by selecting the right buffing compound. If the aluminum surface is heavily oxidized or scratched, start with a more abrasive compound to remove the oxidation. For less severe imperfections, a fine compound might be sufficient. Different grades of compounds are available, offering varying levels of abrasiveness. It’s crucial to choose the right one for your specific project.
Next, take your buffing wheel and attach it securely to your bench grinder or polisher. If using a drill for small tasks, make sure everything is firmly set up. Proper attachment ensures stability during the buffing process. For hand buffing, a clean, soft cloth will work just fine. Apply a small amount of compound to the wheel or the cloth. You only need a little; too much can create a mess and hinder your results.
Now, begin buffing the aluminum surface. If you’re using a machine, turn it on and gently press the wheel against the aluminum. Use slow, steady motions and keep the wheel in constant motion. This helps prevent overheating the metal and minimizes the risk of creating uneven spots. If you’re hand buffing, employ circular motions, maintaining even pressure as you move across the surface.
After several passes, check your progress. Look for areas that may need additional attention. If certain spots appear dull, focus on buffing those areas for a moment longer. This trial-and-error process often yields the best results. Patience is essential; rushing reduces the quality of the finish.
Once you’re satisfied, it’s time to clean up. Remove any residual buffing compound with a clean, dry cloth. This step ensures that you don’t leave any unwanted residue on the surface. After cleaning, you might want to apply a protective sealant or wax. This added layer helps maintain that glossy finish and protects your aluminum from future oxidation.
Tips and Tricks for a Flawless Finish
Getting that perfect shine on your aluminum isn’t just about going through the motions. A few extra tips and tricks can really enhance your results. These insights can save time and effort, making the buffing process more enjoyable and effective.
First, always keep your buffing wheels clean. Dirt and debris can accumulate, leading to scratches on your aluminum. Regularly inspect and clean your buffing pads. Using a wire brush or a soft cloth can help maintain their effectiveness. Clean wheels help ensure a smoother buffing process and better overall results.
Another important tip is to practice your technique before diving into the final project. Consider using a scrap piece of aluminum to familiarize yourself with the buffing method. This not only boosts your confidence but also helps you understand how different compounds work with your aluminum. Practicing on a non-critical piece allows room for error, ensuring your main project stays safe.
Pay attention to your buffing technique. Consistency in speed and pressure is vital. Rapid movements or uneven pressure can result in streaks or inconsistent finishes. Take your time and focus. This patience helps achieve a beautiful, uniform shine across the entire surface.
Finally, don’t overlook post-buffing maintenance. After completing the buffing process, consider applying a protective coating designed specifically for aluminum. Various products, such as wax or sealant, create a barrier against oxidation and environmental damage. Regularly check your buffed surfaces for wear and reapply the protective layer as needed. This small extra step goes a long way in preserving your hard work.
By incorporating these tips into your buffing routine, you can ensure a flawless finish every time. Experience will also teach you what works best for your specific projects. With practice, you’ll feel like a buffing pro in no time!
Post-Buffing Care
Once you’ve successfully buffed your aluminum, the next step is to ensure it stays looking pristine. Proper post-buffing care is essential for maintaining that stunning shine. It involves a few simple yet effective practices to protect and preserve your work.
Start by carefully inspecting the surface after buffing. Look for any missed spots or possible imperfections. If you notice any, you may need to give those areas another quick buffing session. Touching up minor imperfections helps ensure a perfect finish across the entire piece.
Afterward, apply a high-quality protective coating. Many options are available, including wax, sealant, or dedicated aluminum protectants. Sealants are excellent for providing a durable surface that can withstand varying environmental conditions. This added layer not only enhances the shine but acts as a barrier against moisture and dirt, which can lead to oxidation and tarnishing.
Regular cleaning is also crucial in post-buffing care. Clean your aluminum surfaces as needed with a mild soap and water solution or a specifically designed aluminum cleaner. Avoid abrasive cleaners or pads that can scratch the surface. A soft cloth or microfiber towel is ideal for gentle cleaning, allowing you to maintain the beauty of your aluminum without damage.
For frequently used items like kitchen appliances or outdoor furniture, aim for regular touch-up buffing. This doesn’t mean a complete redo; instead, buff specific areas that may have dulled over time. A light buffing can quickly refresh the appearance, ensuring your items always look their best.
Finally, educate yourself on storage methods. If items are stored away, ensure they are kept in a clean, dry environment. Using breathable covers can help prevent dust accumulation. Proper storage can prolong the lifespan of your aluminum and maintain its shine.
By implementing good post-buffing care practices, you can enjoy the beauty of your aluminum surfaces for years to come. The effort you put into protecting your work will pay off, keeping those polished finishes looking fresh and stunning. Your diligence ensures that every buffing job remains as impressive as the first.
FAQs
How often should I buff my aluminum surfaces?
The frequency of buffing depends on the item and its exposure to the elements. For outdoor items or frequently used kitchen appliances, consider buffing every 3 to 6 months. For less-used items or those stored indoors, annual buffing might be sufficient. Regular maintenance will keep your aluminum looking its best.
Can I use any type of buffing compound on aluminum?
Not all buffing compounds are suitable for aluminum. Always choose compounds specifically designed for aluminum surfaces. These products are formulated to remove oxidation without damaging the metal. Using the correct compound is crucial for achieving the best results without causing scratches.
Is hand buffing effective compared to machine buffing?
Yes, hand buffing can be quite effective, especially for small, intricate areas. It allows for more control and precision. However, machine buffing is generally faster and better suited for larger surfaces. The choice depends on the project size and your personal comfort level with each technique.
What should I do if my aluminum surface is heavily oxidized?
If your aluminum is heavily oxidized, start by using a coarse buffing compound specifically designed for removing oxidation. Apply it with a buffing wheel or a non-abrasive cloth. For stubborn spots, consider soaking the area in a vinegar solution before buffing to help break down the oxidation further.
Can I buff aluminum with a regular drill?
Yes, you can use a regular drill with a buffing pad attachment for small buffing tasks. Ensure the buffing pad is securely fastened to the drill. While a drill may not have the same power as a dedicated polisher, it can still effectively buff aluminum surfaces, especially for intricate details or smaller pieces.
How do I protect my aluminum surfaces after buffing?
After buffing, apply a protective coating or wax specifically designed for aluminum. This barrier helps prevent oxidation and keeps the shiny finish intact. Regular cleaning and touch-up buffing will also help maintain the surface’s appearance over time.