Cleaning tarnished brass can feel like a daunting task, especially when those once-glimmering objects lose their shine. But don’t worry! With the right techniques and a little know-how, you can bring back the luster of your brass items and make them sparkle like new. Not only will you restore their beauty, but you’ll also enhance the charm of your home or the value of your cherished possessions.
To clean tarnished brass effectively, start by determining the severity of tarnishing. For light tarnish, a simple mixture of baking soda and vinegar works wonders. If you’re dealing with heavier tarnishing, consider using a commercial brass cleaner. Whichever method you choose, always remember to follow up with a suitable polish to ensure a long-lasting shine.
Throughout this guide, we will dive deeper into the makeup of brass and why it tarnishes over time. Understanding the science behind it will help you appreciate the importance of regular care. We’ll also explore the types of brass items often found in households, from fixtures to décor, so you can identify what needs cleaning. Through knowing what tools and materials to gather, you’ll be better prepared for your cleaning mission.
Additionally, we will share crucial safety precautions to protect yourself during the cleaning process. It’s essential to work in a safe environment, especially when using commercial cleaning products. Lastly, we’ll break down various cleaning methods, from DIY solutions like vinegar and baking soda to commercial options, making sure you have a well-rounded approach to tackle tarnished brass.
What is Brass and Why Does it Tarnish?
Brass is an alloy made primarily of copper and zinc. Its distinct yellowish hue makes it a popular choice for various items, such as jewelry, instruments, and decorative pieces. With its captivating appearance, brass has been a favored material throughout history. However, despite its beauty, brass is not impervious to the elements. One of the primary issues that brass faces is tarnishing.
Tarnishing occurs when brass reacts with oxygen in the atmosphere. This reaction is an oxidation process that leads to a dull and often discolored surface. Factors like moisture, climate, and chemicals can heighten the chance of tarnishing. A humid environment, for example, provides the perfect conditions for tarnish to develop more rapidly. So it’s not just about neglecting the cleaning; the environment plays a key role in maintaining that coveted gleam.
The good news is that tarnishing is a natural process. It doesn’t mean your brass is damaged—rather, it’s a signal that it needs some love and care. Regular maintenance can significantly slow down the tarnishing process. By understanding how brass behaves and what triggers tarnish, you can take proactive measures to keep your brass items looking their best for years to come.
The Importance of Regular Cleaning
Regular cleaning of brass is essential for both aesthetic and health reasons. Not only does it enhance the visual appeal of your items, maintaining their original glory, but it also helps ensure their longevity. When brass remains dirty or tarnished for too long, the tarnish can become difficult to remove, requiring harsher chemicals and more labor-intensive efforts to restore the surface.
Additionally, from a health perspective, tarnished brass can accumulate grime and bacteria over time, especially if it is an item you use frequently. For instance, brass doorknobs and kitchen items are touched multiple times a day, thus harboring unwanted germs. A simple cleaning routine can keep these surfaces sanitary and safe, allowing you to enjoy their beauty without worry.
Cleaning brass regularly can also prevent residues from building up, leading to corrosion, which can irreversibly damage your cherished items. Whether it’s your prized musical instrument or a family heirloom, regular maintenance is a small price to pay to preserve those important objects.
Moreover, appreciating the beauty of gleaming brass can elevate your home’s atmosphere. Clean brass adds a touch of elegance and luxury, transforming the way a space feels. When you invest time in caring for your brass items, you invest in the overall aura of your living space.
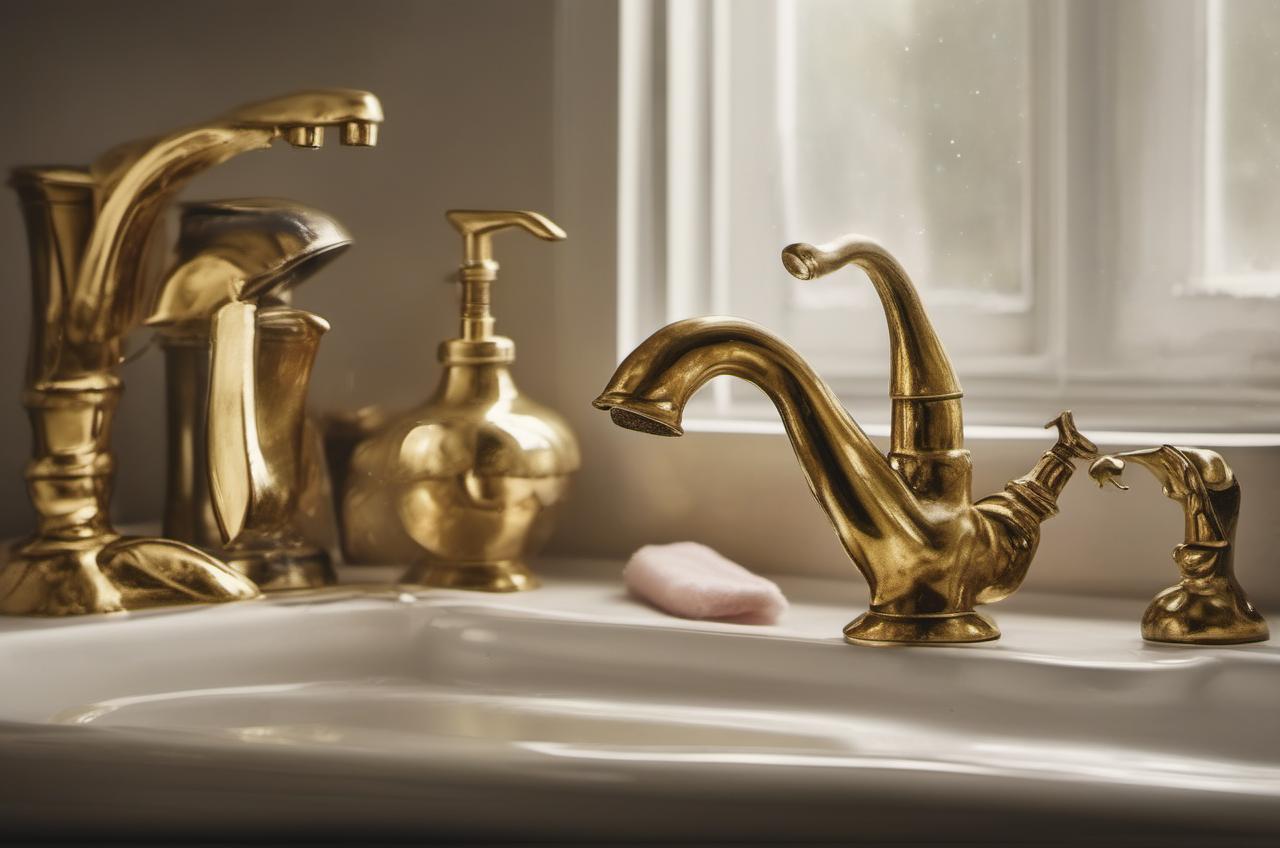
Different Types of Brass Items
Brass can be found in a plethora of items, each serving distinctive purposes and requiring specific care routines. Common household brass items include fixtures like doorknobs, light fixtures, and cabinet handles. These items, often overlooked, benefit immensely from regular cleaning, as they typically endure daily wear and tear.
Another category includes brass décor, such as picture frames, vases, and candle holders. These items serve decorative purposes and can significantly enhance your home’s charm. However, they also accumulate dust and tarnish, which can impede their aesthetic appeal. Ensuring these pieces shine can create a warm and inviting atmosphere in your space.
Musical instruments, such as saxophones, trumpets, and trombones, are also made from brass. These require special care since they are not only functional but also valuable. Proper cleaning and maintenance not only preserve their appearance but also improve their sound quality.
Antique brass pieces carry their own charm but may require even more delicate cleaning solutions due to underlying finishes and patinas. When dealing with antique brass, it’s crucial to identify their value and historical significance before applying aggressive cleaning methods.
In summary, recognizing the various brass items in your home can guide your cleaning efforts. Each item may require different approaches or care routines for optimal results. Once you’re aware of what brass you own, it becomes easier to keep your collection in pristine condition.
Tools and Materials Needed
Cleaning tarnished brass requires a few essential tools and materials. Understanding what you need can streamline the entire process. Proper preparation is vital for achieving the best results and protecting your brass items.
First, you’ll want to gather cleaning supplies. Microfiber cloths are excellent for polishing and will not scratch the brass surface. Avoid using paper towels or rough fabrics, as these can leave behind scratches. Additionally, consider getting small soft-bristled brushes. They can reach into crevices and grooves that need a more thorough clean.
Next, you have the choice of cleaning solutions. Common DIY cleaners include vinegar, baking soda, and lemon juice. These are effective and environmentally friendly. For tougher tarnish, you might want to buy a commercial brass cleaner. Read the labels to ensure the product is safe for your specific brass items. Some cleaners may contain harsh chemicals that can be detrimental to delicate pieces.
In addition to cleaners, a protective polish is critical for post-cleaning care. After you’ve cleaned your brass, applying a thin layer of polish can help prevent future tarnishing. Look for polishes specially formulated for brass to ensure the best results.
Lastly, consider having rubber gloves and masks on hand. These will protect your skin from harsh chemicals and any dust dislodged during cleaning. Working in a well-ventilated area ensures you’re safe while cleaning. Having all your tools organized and accessible will make the cleaning process efficient and enjoyable.
Safety Precautions
When you dive into cleaning tarnished brass, safety should always come first. While most brass cleaners are effective, they can also contain potentially harmful chemicals. Using protective gear is vital. Start with some rubber gloves. They safeguard your skin and provide a barrier between you and any caustic substances. Remember, prolonged exposure can cause skin irritation or allergic reactions.
Next, consider wearing a mask or respirator. This is especially important if you’re using commercial cleaners that may have strong fumes. Good ventilation is crucial, as it reduces inhalation of any harmful particles. Open windows or use fans to keep air circulating in your cleaning area. If you have sensitive skin or respiratory issues, taking these precautions makes the experience more comfortable.
Keep the cleaning area organized and free from clutter. Tidy surroundings minimize accidents like spills or slips. If you’re working with high-traffic items such as doorknobs, make sure to place mats or cloths underneath to catch any drips. This keeps your surfaces intact and prevents scratches to flooring or countertops.
Always follow manufacturer guidelines when using commercial cleaners. Many products provide specific instructions for safe handling and application. Diving into cleaning without proper knowledge can lead to mishaps. Reading these guidelines is a small step that can save you from larger headaches later.
Finally, if you are cleaning antique brass or valuable pieces, consider consulting a professional. This ensures that the historical value is preserved without the risk of damage. When in doubt, it’s always best to err on the side of caution.
Assessing the Condition of Your Brass
Before you begin cleaning, it’s crucial to assess the condition of your brass items. Some pieces might have only light tarnishing, while others can be heavily tarnished or corroded. Proper assessment will help you choose the most suitable cleaning method.
To start, inspect the surface carefully. Look for any signs of tarnish color—a lighter shade can mean mild tarnishing, while a darker hue often indicates more significant buildup. In many cases, a simple cleaning solution can restore light tarnish. However, deeper discoloration might require more rigorous efforts and possibly commercial products.
Next, consider the item’s age and provenance. Antique brass may have underlying finishes that could be affected by harsh cleaning methods. If the item is a valuable antique or historical piece, it’s wise to protect it and approach cleaning cautiously. You may want to test any cleaning method on a small, inconspicuous area first to see how the material reacts.
Additionally, look for any signs of corrosion or physical damage. If you notice pitting or deterioration, it’s best to consult a professional restorer. Harsh cleaning processes can exacerbate small areas of damage, leading to more significant issues in the long run.
Once you have your brass items assessed, create a cleaning plan based on their specific needs. Knowing the condition helps you avoid any rookie cleaning mistakes. Address the proper methods, tools, and cleaners suitable for your specific brass.
Understanding the condition of your brass is vital for preserving its beauty and longevity. Approach the cleaning process with care, and you’ll see the rewards of your labor shine through.
DIY Cleaning Solutions
One of the most satisfying and economical ways to clean tarnished brass is through DIY cleaning solutions. Using items easily found around the house can be both effective and safe for your brass items. Here’s a look at some popular homemade cleaners that work wonders on tarnished brass.
First up is the classic baking soda and vinegar combination. Simply mix equal parts of baking soda and vinegar to create a paste. Apply this paste directly to your brass item using a soft cloth. Rub in a circular motion to assist in removing tarnish. The gentle abrasion of the baking soda works well, while vinegar’s acidity helps dissolve tarnish quickly. After scrubbing, rinse thoroughly with warm water and dry with a soft cloth for a beautiful shine.
Another effective solution involves lemon juice and salt. The acidity of lemon juice is a natural cleaner. When combined with salt, it becomes a powerful tarnish remover. To make this, mix lemon juice with enough salt to create a paste. Spread the paste on the brass, allowing it to sit for about 10 minutes. This time will let the solution break down the tarnish. Rinse the brass under warm water, dry it, and enjoy the sparkle!
For light tarnishing, simply using warm soapy water can be sufficient. Mix a few drops of mild dish soap in a bowl of warm water and dip a soft cloth into the solution. Gently clean the brass items with the damp cloth, ensuring to reach all areas. Rinse with warm water and buff dry. This is a gentle approach that’s great for frequent cleaning.
If you’re after an extra shine, consider using a combination of olive oil and vinegar. Mix two parts olive oil with one part vinegar. This solution can both clean and provide a protective layer over the brass. Apply it with a soft cloth, rubbing in a circular motion. This method is perfect for polished brass that needs a little extra love.
Creating and using these DIY cleaning solutions is a fun way to revive your brass items. It’s also rewarding as you can see the transformation right before your eyes. Plus, you’re utilizing everyday household items rather than harsh chemicals.
Commercial Brass Cleaning Products
While DIY solutions are popular for cleaning brass, sometimes commercial brass cleaning products are the best choice for tough tarnish. Knowing how to choose the right product can make a world of difference in your cleaning experience.
Many commercial brass cleaners are formulated with specific ingredients aimed at removing tarnish effectively. Look for products labeled especially for brass to ensure they won’t cause damage. Popular brands often include Brasso, Wright’s, and Nevr-Dull. These cleaners are available in most hardware and home improvement stores.
When choosing a cleaning product, consider the type of brass item you’re working with. Some cleaners are suitable for decorative brass, while others are designed for more functional pieces, like plumbing. Always read the label to make sure the cleaner aligns with your specific cleaning need.
Application is usually straightforward. Most commercial cleaners require you to apply the solution with a soft cloth and rub it on the tarnished areas. Allow it to sit for a specified time to let the product work its magic. Then, rinse thoroughly and dry the item.
Though effective, be cautious with the amount you use. Excessive application of commercial products could leave residue, leading to a dull finish. Moreover, whenever using chemicals, work in a well-ventilated area. It’s also wise to wear gloves to protect your skin from irritation.
After cleaning with commercial products, using a good polish is essential. It helps restore shine and forms a protective barrier against future tarnishing. Applying a specialized brass polish can significantly extend the time between cleanings, keeping your items looking their best.
Step-by-Step Cleaning Process
Cleaning tarnished brass doesn’t have to feel overwhelming. Following a simple, structured step-by-step cleaning process can help simplify the task. Here’s a reliable method to consider.
Step 1: Gather Your Supplies
Start by gathering all your necessary tools and materials. Ensure you have chosen either a DIY solution or a commercial cleaner. Along with these, have microfiber cloths, brushes, and water on hand. Setting up your workspace will streamline the entire cleaning experience.
Step 2: Assess and Prepare
Before applying cleaners, assess the brass items you’re going to clean. Identify the level of tarnish and determine the best cleaning method. If you’re using a commercial cleaner, read the instructions thoroughly. If you have opted for a DIY solution, prepare it according to your recipe.
Step 3: Apply the Cleaner
Gently apply your chosen cleaner to the tarnished areas. Use a soft cloth or sponge for application. If you’re using a paste, ensure that it covers all tarnished spots evenly. For intricate designs, a small soft-bristle brush can effectively reach tight areas.
Step 4: Allow Time to Work
Once the cleaner has been applied, let it sit for the instructed time. This waiting period allows the solution to break down the tarnish effectively. Avoid letting the cleaner dry out, as it might create more work later.
Step 5: Rinse Thoroughly
After the waiting period is over, rinse the brass item under warm water. Ensure that all cleaning solution is removed. Any remaining cleaner may lead to streaking or dullness.
Step 6: Dry and Polish
Dry your item with a soft, clean cloth. This step is essential to prevent water spots. After drying, consider applying a brass polish to restore the shine and protect the surface. Use a small amount and buff gently to bring out the luster.
Following this methodical cleaning process will help you effectively restore the shine of your brass items. By taking your time and ensuring you do each step thoroughly, you’ll enjoy the results even more. Your brass will not only look shiny but also show off the love and care you’ve provided.
Preventing Future Tarnish
Once your brass items are gleaming again, the next step is prevention. Understanding how to stop tarnish from forming again can save you time and effort in the long run. Here are some effective strategies.
Regular Cleaning
Incorporating regular cleaning into your routine can significantly minimize tarnish buildup. Simple maintenance, like wiping down brass surfaces with a microfiber cloth can remove dust and oils. Aim for a light clean every few weeks to keep tarnishing at bay.
Use a Protective Coating
Applying a high-quality brass polish after cleaning can add a protective layer. This layer acts as a barrier against environmental elements that cause tarnishing. Make polishing a part of routine maintenance. It helps maintain the vibrant shine and prolongs the time between deep cleaning sessions.
Control the Environment
Brass tarnishes more quickly in humid environments, so control your surroundings if possible. Consider using dehumidifiers in rooms with brass items. Additionally, keeping brass away from windows or areas with direct sunlight can reduce exposure to damaging UV rays.
Store Properly
For brass items that you don’t use frequently, proper storage is vital. Wrap each item in anti-tarnish cloth or store them in air-tight containers. This method dramatically cuts down on exposure to moisture and air, preventing tarnish from developing.
Limit Contact with Chemicals
Be mindful about where you place your brass items. Avoid putting them near chemical-heavy areas, like kitchens or bathrooms. Cooking fumes, cleaning agents, and even moisture from daily use can contribute profoundly to tarnish.
Consistent care and proactive measures can extend the life and beauty of your brass items. Enjoy their brilliance longer by incorporating these preventative tips into your routine. Your efforts will make all the difference!
FAQs
How often should I clean my brass items?
It’s recommended to clean brass items every few weeks if they are frequently used or handled. For decorative pieces that are not touched often, a thorough cleaning every 1-3 months should suffice. Regular maintenance helps prevent heavy tarnish buildup.
Can I use vinegar on all brass items?
While vinegar is an effective cleaner for most brass items, it’s crucial to test it on a small, inconspicuous area first, especially for antiques or pieces with special coatings. Some finishes or patinas may react adversely to acidic cleaners like vinegar.
What should I do if my brass item has scratches?
If your brass item has scratches, minor ones can often be polished out using a soft brass polish and cloth. For deeper scratches, consider using a fine polishing compound and buffing them out carefully. In some cases, seeking professional help is advisable, especially for valuable items.
Are there any brass items I should avoid cleaning myself?
Yes, you should avoid cleaning delicate or valuable antiques, intricate musical instruments, or items with special finishes without consulting a professional. These pieces can be damaged by incorrect cleaning methods or harsh chemicals. Always err on the side of caution with valuable items.
Is it safe to use commercial brass cleaners?
Yes, commercial brass cleaners can be safe when used as directed. Always read the manufacturer’s instructions carefully, wear protective gloves, and work in a well-ventilated area. Some products may contain harsh chemicals, so ensure they are appropriate for your specific brass items.
Can I prevent tarnish from forming on my brass items?
Yes, you can minimize tarnish formation by regularly cleaning your brass items, applying a high-quality protective polish after cleaning, and storing them properly in a dry environment. Limiting exposure to moisture and chemicals also helps maintain their shine.